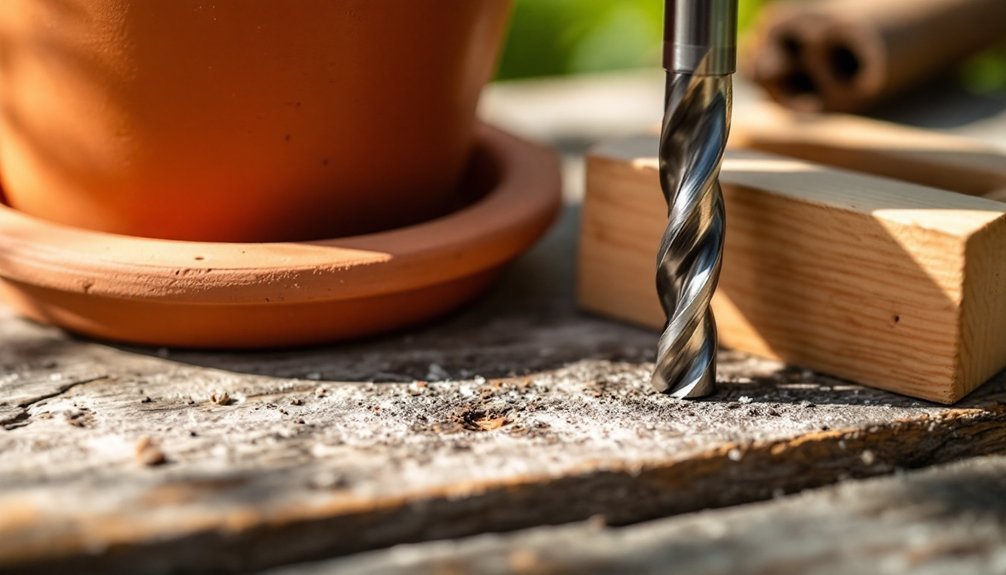
You'll need a power drill and specific drill bits based on your pot's material: standard bits for plastic, masonry bits for unglazed ceramics, diamond-tipped for glazed ceramics, and cobalt steel for metal planters. Don't forget safety goggles and a spray bottle with water to cool the drill bit while working. Create a stable workspace with good lighting and use masking tape to prevent bit slippage. There's much more to mastering the perfect drainage hole technique.
Essential Tools for Creating Drainage Holes
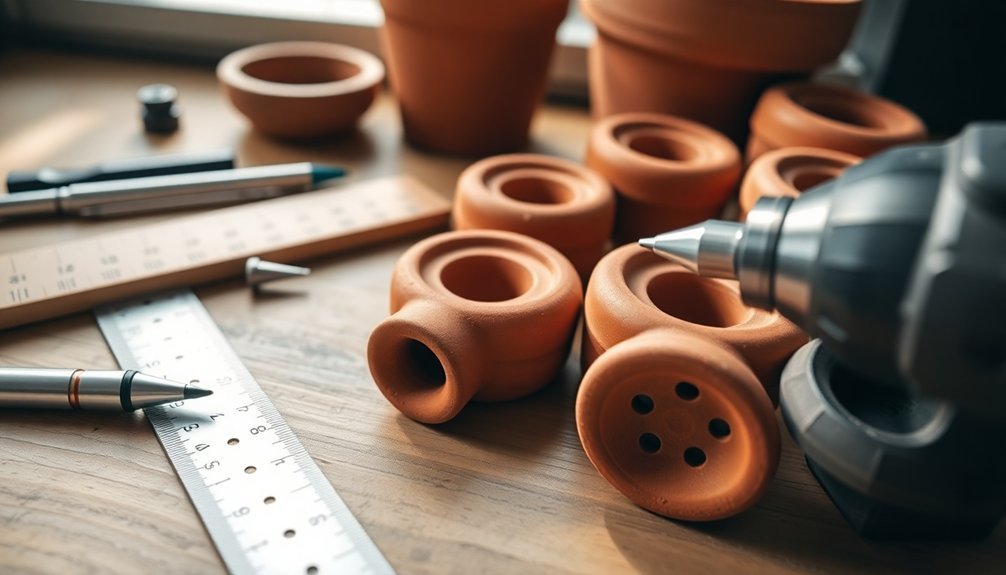
When it comes to creating drainage holes in your pots, having the right tools makes all the difference.
You'll need a power drill as your primary tool, along with specific drill bits matched to your pot's material. For plastic pots, standard bits work well, while unglazed ceramics require masonry bits. If you're working with glazed ceramics, you'll want to invest in diamond-tipped bits for the best results.
Don't forget to keep a spray bottle filled with water nearby to cool both the drill bit and pot surface as you work.
To guarantee accuracy, use a nail to create starter points where you'll drill your drainage holes. Most importantly, always wear safety goggles to protect your eyes from flying debris during the drilling process.
Choosing the Right Drill Bits for Different Pot Materials
Since different pot materials require specific drill bits for ideal results, selecting the right bit is essential for creating perfect drainage holes.
For unglazed terra cotta pots, you'll need a masonry bit to prevent cracking during drilling. If you're working with glazed ceramics, opt for diamond-tipped bits that can handle the smooth, hard surface.
When drilling plastic containers, use sharp twist bits with a backing board to avoid melting the material.
Metal planters demand cobalt steel bits, and you'll get better results by adding cutting oil to reduce heat.
For fiberglass pots, choose carbide-tipped bits and apply masking tape to the drilling spot to prevent the bit from slipping.
With the right bit for each material, you'll create clean, precise drainage holes every time.
Safety Equipment and Workspace Setup
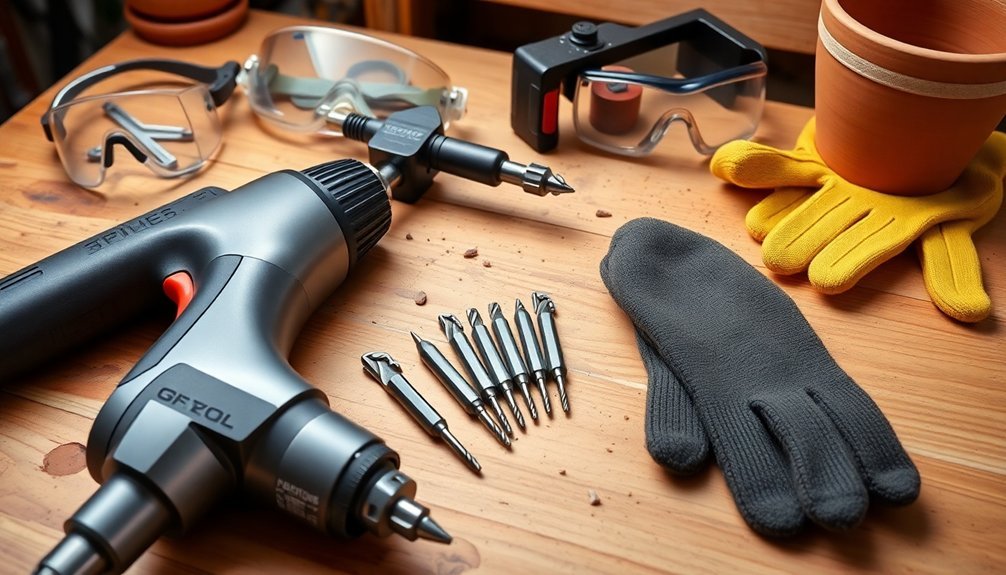
Before drilling drainage holes, three essential safety measures protect you and your workspace. You'll need safety goggles to shield your eyes, a stable surface for your work area, and proper ventilation.
Create a secure setup by placing your pot on a flat surface with a towel underneath to prevent slipping and damage. Keep a firm grip on both your tools and the pot while ensuring it's securely held away from table edges.
- Position yourself in a well-lit area where you can clearly see your drilling marks
- Spread a thick towel across your work surface to catch debris and protect the pot
- Open nearby windows or work in a garage with the door open
- Remove any clutter from your workspace that could interfere with movement
- Set up your tools within easy reach but away from the pot's edges
Preparing Your Pots Before Drilling
Your first step is to soak your terra cotta pots overnight, which softens the material and reduces the risk of cracking during drilling.
You'll need to mark your intended drill points with a nail to create a stable starting point and prevent the drill bit from sliding across the surface.
Starting with a smaller drill bit, such as 1/4 inch, sets you up for success before moving to larger sizes if needed.
Mark Drill Points First
Proper preparation makes all the difference when creating drainage holes in pots. Before you pick up your drill bit, you'll need to mark drill points on the pot surface with precision. Create starter points using a nail or marker, guaranteeing stability throughout the process. For larger pots, plan multiple drainage holes evenly across the base for ideal water flow.
- Place masking tape over your marked spots to prevent the drill bit from slipping
- Make indentations with a nail to guide your drill accurately
- Space marks evenly around the pot's base for balanced drainage
- Confirm your pot sits firmly on a stable surface while marking
- Soak unglazed terracotta overnight for easier marking and drilling
These careful marking steps will greatly improve your accuracy and help prevent pot damage during drilling.
Soak Terra Cotta Overnight
While marking drill points sets you up for success, preparing terra cotta pots requires an additional step. You'll need to soak overnight any unglazed pot before drilling drainage holes. This essential preparation makes the drilling process smoother and prevents cracking.
| Soaking Benefits | Impact on Drilling |
|---|---|
| Softens clay | Easier drilling |
| Hydrates material | Reduces cracking |
| Cools drill bit | Extended bit life |
| Improves accuracy | Better control |
Submerge your pot in water for at least 12 hours to achieve ideal moisture content. Once soaked, dry the surface where you'll drill, keeping the pot stable during the process. This preparation not only makes drilling easier but also guarantees proper water drainage in your finished pot, preventing root rot and promoting healthy plant growth through improved airflow to the roots.
Choose Right Drill Bit
Selecting the right drill bit makes or breaks your pot-drilling success. You'll need different bits depending on your pot's material.
For drainage holes in plastic pots, standard drill bits work perfectly. When working with unglazed ceramics, reach for masonry bits, especially after soaking terra cotta overnight. For glazed ceramics, don't skimp – invest in diamond-tipped bits to prevent damage.
- Standard bits slice through plastic like butter
- Masonry bits grip and grind through unglazed surfaces
- Diamond-tipped bits glide across glazed finishes
- Water-cooled bits prevent overheating and cracking
- Small starter bits create pilot holes for larger ones
Remember to start with smaller bits and gradually increase size.
Keep your drilling surface wet to prevent overheating and maintain control. This methodical approach guarantees clean, crack-free drainage holes every time.
Step-by-Step Drilling Techniques
Creating drainage holes requires five precise steps that assure success and prevent pot damage. First, mark your starter point with a nail to guarantee drill bit stability. Then, select your drill bit based on your pot's material – you'll need masonry bits for unglazed ceramics and diamond-tipped for glazed ones. Keep water flowing over the drill bit and pot to prevent overheating while adding drainage holes. Start with smaller bits and gradually increase size for proper watering capabilities. Always keep the drill perpendicular to achieve clean holes.
| Step | Action | Time | Tool |
|---|---|---|---|
| 1 | Mark Point | 30s | Nail |
| 2 | Select Bit | 1m | Drill Bit |
| 3 | Add Water | 30s | Spray Bottle |
| 4 | Start Small | 2m | 1/4" Bit |
Water Cooling Methods During Drilling
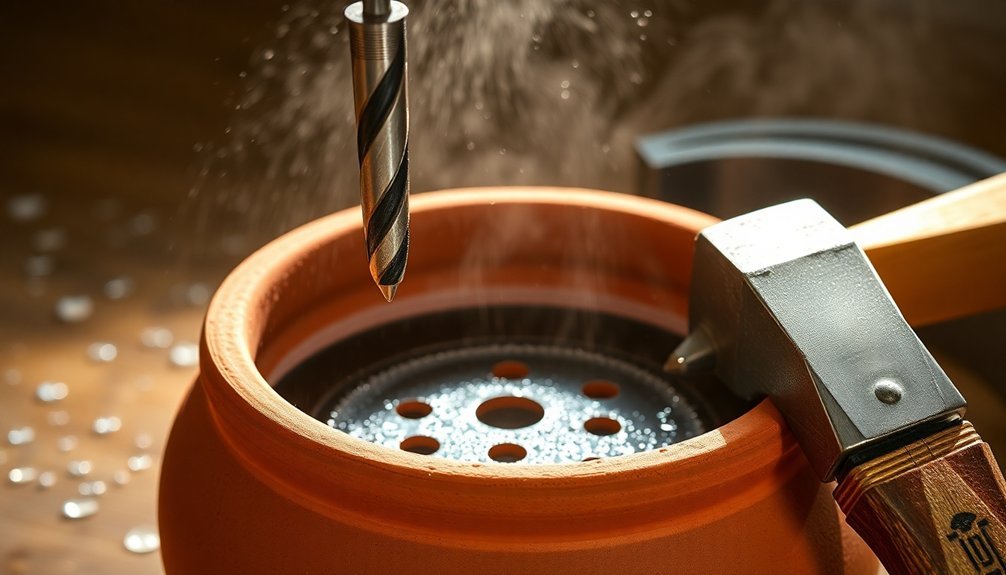
Water plays a central role in successful pot drilling, protecting both your tools and materials throughout the process.
You'll need to maintain constant cooling while drilling to prevent damage and guarantee smooth results. A spray bottle filled with water offers precise control, letting you target both the drill bit and pot surface effectively. If you're working outdoors, you can use a garden hose for continuous water flow during drilling.
- Water droplets glistening on the ceramic surface
- Steam rising as water meets the hot drill bit
- Clear streams flowing down the pot's sides
- Fine mist spraying in rhythmic patterns
- Cooling droplets collecting at the drilling point
For best results, ask someone to help you maintain consistent water cooling while you focus on drilling.
This team approach guarantees proper temperature control and prevents your materials from overheating.
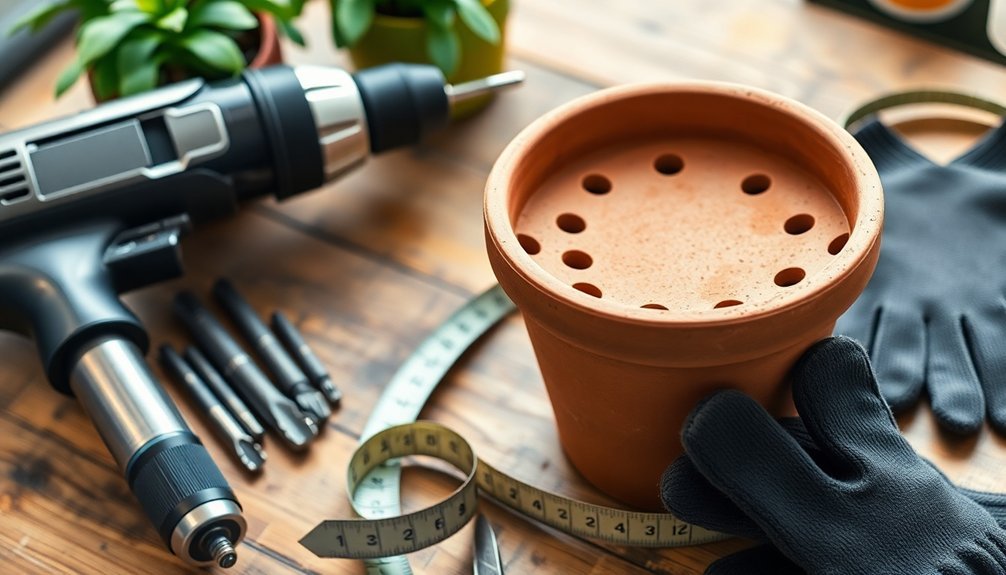
Proper Hole Placement and Spacing
When placing drainage holes in your pots, start with a central hole at the bottom and add additional holes every 3-4 inches toward the edges for ideal water distribution.
You'll want to keep these holes at least 1/2 inch from the pot's rim to prevent structural weakness, especially in ceramic containers.
For the best results, create a symmetrical pattern of 1/4 to 1/2 inch holes that allows excess water to escape evenly while maintaining proper soil aeration.
Center Bottom Hole Patterns
The ideal center bottom hole pattern plays a crucial role in your pot's drainage success. When creating drainage holes, you'll want to focus on proper spacing and placement to guarantee effective water flow.
For pots under 6 inches, drill one 1/4 to 1/2 inch hole in the center. Larger pots require multiple holes spaced 1-2 inches apart to maintain structural integrity while preventing water accumulation.
- Picture a perfectly centered single hole allowing water to flow freely
- Envision three evenly spaced holes forming a triangle pattern
- Imagine using a template to mark precise hole positions
- Visualize drainage holes creating a balanced circular formation
- See water smoothly flowing through strategically placed openings
Position your holes near the bottom's center to maximize drainage efficiency while preserving your pot's stability and appearance.
Multiple Edge Hole Benefits
Strategic placement of multiple drainage holes along a pot's edge creates superior water management compared to center-only designs.
You'll want to position 4-6 holes around the bottom edge, keeping them about 2-3 inches apart to prevent water pooling and enhance drainage efficiency.
Distance Between Drainage Points
Proper spacing between drainage holes directly impacts your pot's ability to manage water effectively.
You'll want to maintain 1-2 inches between holes to guarantee excess water flows freely. For pots larger than 12 inches in diameter, space multiple drainage holes evenly around the base to enhance moisture control.
When creating drainage holes, remember these key spacing considerations:
- Keep holes at least 1 inch from the pot's edge to prevent cracking
- Space holes in a circular pattern for even water distribution
- Position holes evenly across the base for balanced drainage
- Consider your pot's size when determining hole quantity
- Plan hole placement before drilling to guarantee proper spacing
Remember to size each hole between 1/4 and 1/2 inch in diameter.
This spacing strategy helps prevent soil loss while maintaining peak root health and water management.
Alternative Tools for Non-Electric Methods
Creating drainage holes doesn't always require power tools, as several common household items can effectively get the job done. You'll find that a hammer and nail combination works perfectly for plastic and wooden planters, while a sharp screwdriver can chip away at softer materials. For ceramic containers, a chisel proves invaluable for breaking through tough surfaces.
| Tool Choice | Best For | Technique |
|---|---|---|
| Hammer & Nail | Plastic/Wood | Tap firmly to puncture |
| Screwdriver | Soft Materials | Apply steady pressure |
| Utility Knife | Fiberglass | Score and break through |
When working with fiberglass pots, combine a utility knife with controlled hammer taps for clean results. If you're looking for more precision, a manual rotary tool with various attachments offers versatility across different pot materials and desired hole sizes.
Common Mistakes to Avoid While Drilling

Selecting the wrong drill bit for your pot's material can lead to cracking, chipping, or incomplete holes that compromise drainage effectiveness.
You'll often damage your pots by applying too much pressure during drilling, when a gentle, steady hand yields better results.
Before you start drilling, properly preparing the surface by marking your intended holes and securing the pot will prevent many common mishaps that lead to uneven or misplaced drainage holes.
Wrong Drill Bit Selection
Three critical mistakes with drill bit selection can quickly ruin your planting containers.
Using undersized bits creates insufficient drainage holes, while the wrong bit type can shatter your pots.
You'll need a diamond-tipped bit for glazed ceramics to prevent cracking, and a sharp twist bit for plastic to avoid overheating.
- A regular drill bit sliding across a ceramic pot's surface, creating spider-web cracks
- A masonry bit effortlessly cutting through unglazed terracotta
- A diamond-tipped bit smoothly penetrating glazed ceramics
- An oversized hole causing a pot to wobble unstably
- A twist bit cleanly drilling through plastic without melting
Always start with pilot holes to guide your drill and prevent wandering.
Excessive Drilling Pressure
While drilling drainage holes may seem straightforward, applying too much pressure is a common mistake that can quickly destroy your favorite planter. You'll need to maintain steady pressure throughout the process, letting the drill bit do the work rather than forcing it through the material.
Start with a smaller drill bit and work your way up gradually to prevent cracking, especially in delicate materials like ceramics and terracotta.
Keep the drill bit and pot surface moist to reduce heat buildup, which can melt plastic or cause ceramic pots to break. When you're drilling, hold the pot firmly to prevent slipping – any unwanted movement can create angled holes and weaken your planter's structure.
With gentle, consistent pressure, you'll create a clean hole without compromising your pot's integrity.
Skipping Surface Preparation
Proper surface preparation stands as the foundation for successfully drilling drainage holes in any pot.
You'll need to take several critical steps before even touching your drill bit to the pot surface to prevent common mishaps and guarantee success.
- Place a thick towel on your work area to create a stable surface that prevents the pot from sliding.
- Soak unglazed pots overnight to soften the material and reduce resistance while drilling.
- Mark your starter point clearly with a permanent marker or pencil to prevent drill bit slippage.
- Keep a spray bottle nearby to maintain moisture on the drilling area and prevent overheating.
- Position your pot securely on a level surface with proper support underneath.
Skipping these preparation steps often leads to cracked pots, uneven holes, or damaged drill bits.
Measuring and Marking Guidelines
Success in creating drainage holes starts with accurate measuring and marking. Before you begin drilling, measure and mark your desired hole locations at least 1-2 inches from the pot's edge to maintain structural integrity.
Create a small starter point using a nail or marker to guide your drill bit and prevent slippage during the process. For larger containers, you'll want to mark multiple points evenly around the base to guarantee proper water flow.
A helpful trick is to apply masking tape over your marked spots – this prevents the drill bit from slipping and reduces material chipping. Always take time to double-check your measurements and placement before drilling.
This attention to detail will result in drainage holes that are both functional and aesthetically pleasing.
Post-Drilling Care and Finishing
Three essential steps follow the drilling process to confirm your pot functions properly.
You'll need to clean away plastic shavings, smooth any sharp edges with sandpaper, and fill with well-draining potting mix.
These finishing touches guarantee proper drainage and protect both plant roots and your hands during maintenance.
- Picture yourself running your fingers along each drainage hole, feeling for rough spots that need attention
- Visualize sweeping away debris like a careful craftsman perfecting their work
- Imagine testing water flow through each hole, watching it drain freely
- See yourself checking the pot's base, maintaining ideal humidity control
- Envision inspecting the holes regularly, keeping them clear and functional
Remember to perform routine maintenance checks to prevent clogs and maintain favorable growing conditions for your plants.
Tool Maintenance and Storage
A craftsman's tools are only as good as their maintenance routine. To keep your drill bits in top condition, store them in a protective case or on a magnetic strip where you can easily organize and access them.
You'll want to inspect your bits regularly for signs of wear and replace them when they become dull to prevent damage to your pots. After each use, clean your drill bits thoroughly to remove debris that could lead to rust, especially if you're working with metal bits.
Keep all your tools in a dry environment to protect them from moisture damage. It's smart to create a simple maintenance schedule to track when you last sharpened or replaced your bits.
This proactive approach guarantees your tools will be ready whenever you need to drill drainage holes.
Best Practices for Different Container Types
Different container materials demand specific approaches when creating drainage holes to guarantee the best results. You'll need to match the right drill bits and techniques to your container type for success.
- Picture yourself soaking an unglazed terra-cotta pot overnight, then carefully using masonry bits with gentle pressure.
- Imagine steadily drilling through glazed ceramic with diamond-tipped bits while keeping the surface wet.
- Visualize creating a small pilot hole in plastic planters before expanding it with sharp twist bits.
- See yourself applying cutting oil while drilling metal containers with cobalt steel bits.
- Envision working at low speed with carbide-tipped bits on fiberglass, wearing protective gear.
Remember to maintain low speed throughout your drilling process, regardless of container type. This careful approach helps prevent common issues like cracking, melting, or material damage while ensuring proper drainage holes.
Frequently Asked Questions
What Tool Is Used to Make Holes in Pots?
You'll need an electric drill with material-specific bits: masonry bits for unglazed ceramic, diamond-tipped for glazed pots, twist bits for plastic, and cobalt steel for metal. A Dremel tool works well too.
How Do I Get Good Drainage in My Pots?
You'll get good drainage by drilling 1/4 to 1/2 inch holes in your pots, using well-draining soil mix, adding gravel at the bottom, and elevating containers with pot feet for water escape.
What Is the Best Drill Bit for Holes in Plastic Pots?
You'll get the best results with a sharp twist drill bit. Start with a 1/4-inch pilot hole, then use your desired larger size. Work slowly to prevent plastic melting, and you'll create perfect drainage holes.
How Big Should I Drill Drainage Holes in Pots?
You'll want to drill holes between 1/4 to 1/2 inch in diameter. For larger pots, create multiple holes spaced evenly. Start with smaller holes and gradually enlarge them to prevent cracking.
In Summary
Your success in creating perfect drainage holes depends on selecting the right tools for your pot material and using them correctly. Keep your drill bits sharp, maintain proper safety equipment, and store your tools in a dry place. With practice and the proper technique, you'll create professional-looking drainage holes every time. Remember to clean your pots and tools after each use for the best results.


Leave a Reply