You can propagate your Arrowhead plant through either water or soil methods, with both offering unique benefits. Water propagation lets you watch roots develop in a clear container, while soil propagation creates stronger root systems from the start. For either method, take 4-6 inch cuttings with 2-3 nodes during spring or summer when growth is active. Keep cuttings in bright, indirect light and maintain consistent moisture. The following steps will transform your cuttings into thriving new plants.
Understanding Your Arrowhead Plant
While many houseplants require complex care routines, the Arrowhead Plant stands out for its adaptability and ease of maintenance. You'll find this Central and South American native particularly appealing for its distinctive arrow-shaped foliage, which comes in various colors and patterns.
Before diving into propagation methods, you'll want to verify your plant is thriving in its current environment. Your Arrowhead Plant will flourish in bright, indirect light and temperatures between 65-75°F.
While it's generally pet-friendly, keep an eye on curious pets as it can be mildly toxic if consumed in large amounts.
When you're ready for water propagation or other growing techniques, you'll be pleased to know that regular pruning not only maintains the plant's bushy appearance but also provides perfect cutting opportunities during the growing season.
Essential Tools for Successful Propagation
To start propagating your Arrowhead plant, you'll need clean, sharp pruning shears, a clear glass container for water propagation, or a well-draining pot with appropriate soil mix for soil methods.
Rooting hormone and proper growing medium (either water or a light soil mix with perlite) are essential for encouraging healthy root development.
If you want to optimize your propagation setup, consider adding tools like a spray bottle for maintaining humidity and a moisture meter for monitoring growing conditions.
Basic Tools You Need
Success in Arrowhead Plant propagation depends on having the right tools at your disposal. You'll need a clean pruning tool, such as Felco 2 or Fiskar micro-tip pruners, to make precise cuts that won't damage your plant. These tools help minimize stress and create ideal conditions for new growth.
For your propagation setup, you'll need either a clear glass container for water propagation or a pot with drainage holes for soil methods. If you're using soil, choose a well-draining soil mix like succulent and cactus blend or regular potting soil enhanced with perlite.
To boost your chances of success, consider using rooting hormone on your cuttings. Remember to start with a healthy mother plant that has mature stems – this will greatly improve your propagation results.
Optional Advanced Equipment
Although basic tools can get you started, several advanced pieces of equipment can greatly boost your propagation success rate. These optional tools can considerably enhance your propagation process and improve rooting success, especially when working with challenging cuttings.
| Equipment | Purpose |
|---|---|
| Rooting Hormones | Stimulates root development |
| Heat Mat | Maintains ideal soil temperature |
| Humidity Dome | Controls moisture levels |
You'll find that investing in these advanced tools can make a noticeable difference in your propagation outcomes. A heating mat helps maintain consistent soil temperatures, while a humidity dome creates the perfect environment for delicate cuttings. When using rooting hormones, you'll typically see faster root development and stronger growth. While these items aren't mandatory, they can transform your basic propagation setup into a more efficient and successful growing system.
Best Times to Take Cuttings
When propagating your Arrowhead Plant, timing plays an essential role in success. The best time to propagate is during the active growth phase in spring and summer when your plant is at its most vigorous. These seasons provide ideal conditions for successful rooting and establish healthy new plants.
While early fall propagation is possible for some varieties if you maintain warm, humid conditions, you'll want to avoid taking cuttings during winter when growth naturally slows down.
For the highest success rate, look for these indicators before taking your cuttings:
- Healthy, robust growth on the mother plant
- Mature stems with clearly visible nodes
- Active new growth appearing
- Firm, green leaves without signs of stress or damage
These signs indicate your plant is ready to support new growth through propagation.
Preparing Your Mother Plant
Proper preparation of your mother plant sets the foundation for successful Arrowhead propagation. Before taking any cuttings, you'll need to verify your mother plant is healthy and well-established.
Place it in a spot with bright, indirect light and maintain consistent watering to promote vigorous growth.
Select stems that are at least 4-6 inches long with visible nodes for the best results. You'll want to limit yourself to taking only 3-4 cuttings to prevent stressing the mother plant.
When you're ready, use clean, sharp pruning shears to make precise cuts just below the nodes. To boost root development, you can apply rooting hormone to the cut ends.
This careful preparation will greatly increase your chances of successful propagation, whether you choose water or soil methods.
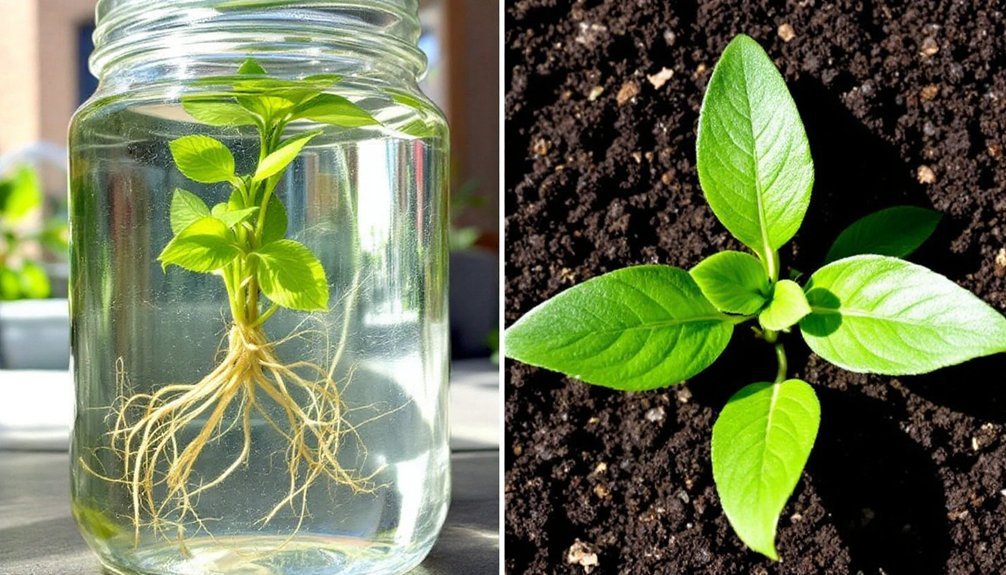
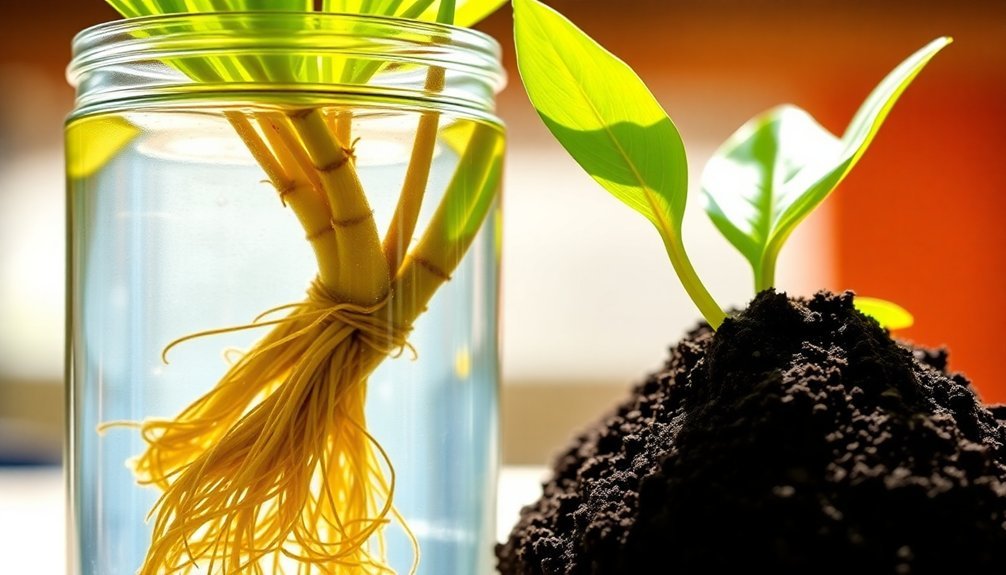
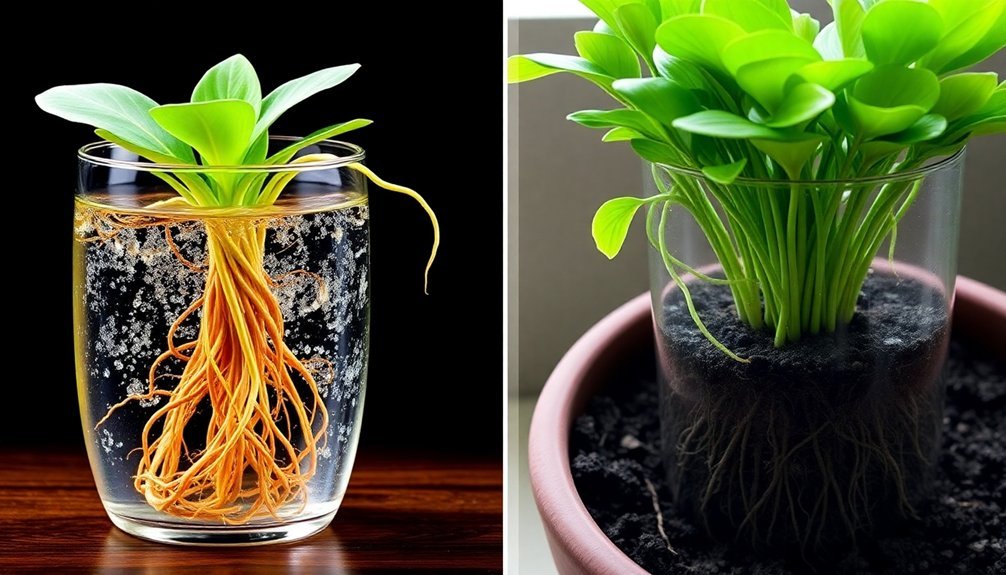
Water Propagation Step-by-Step
Water propagation offers a straightforward and rewarding method for growing new Arrowhead plants. Select a healthy stem cutting that's 4-6 inches long, ensuring it has 2-3 nodes for ideal root development. Remove the lower leaves to prevent rotting, and place the cutting in fresh water.
Here's your step-by-step water propagation guide:
- Position your cutting in a bright, warm spot away from direct sunlight.
- Keep nodes submerged while keeping leaves above water.
- Change the water every 5-7 days to prevent bacterial growth.
- Watch for roots to emerge within 6-7 days.
Once roots reach a couple inches in length, you'll be ready to transfer your cutting to soil.
Remember to maintain proper water levels during the propagation process, as consistent moisture is essential for successful rooting.
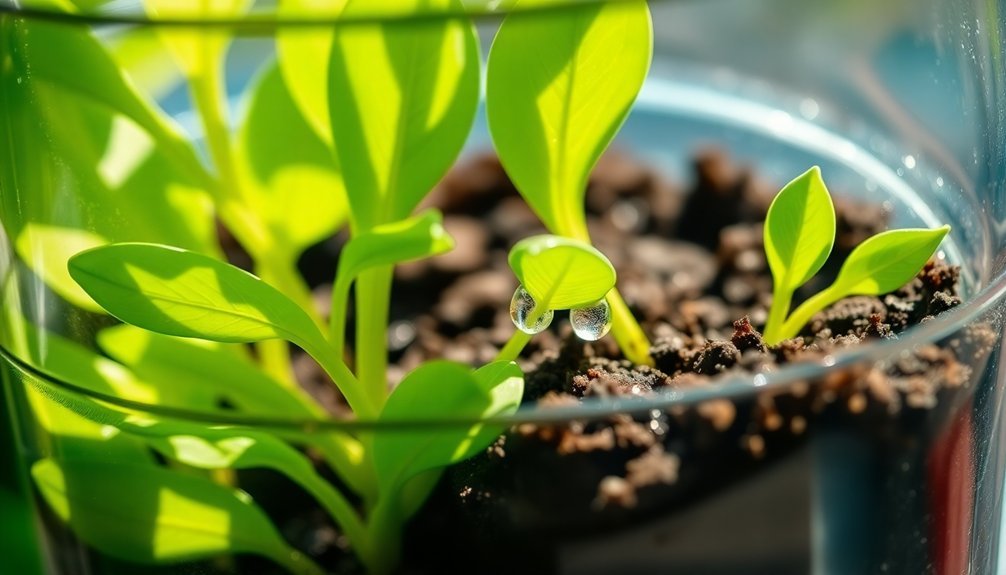
Soil Propagation Technique Guide
You'll want to start by filling a small pot with well-draining succulent or cactus mix, which provides the perfect foundation for your Arrowhead cutting to establish roots.
After placing your 4-6 inch cutting in the soil with the node covered, maintain consistent moisture by watering every 4-5 days while avoiding waterlogged conditions.
Within 4-6 weeks, you'll notice signs of successful rooting through new leaf growth at the top and roots emerging from drainage holes at the bottom.
Soil Mix and Prep
Selecting the right soil mix is essential for successfully propagating your Arrowhead Plant cuttings.
You'll want to create a well-draining indoor potting mix using peat moss, perlite, and pine bark. This combination guarantees proper aeration while maintaining ideal moisture levels for root development.
Before planting your cuttings, prepare your pot and soil mix with these key steps:
- Choose a pot with drainage holes to prevent water accumulation and root rot
- Fill the pot with your prepared soil mix, leaving room for the cutting
- Insert the cutting so the node is just beneath the soil surface
- Water lightly to moisten the soil without making it waterlogged
Monitor the soil's moisture levels by watering every 4-5 days.
You'll know roots have developed when you feel resistance after gently tugging the cutting, typically within 4-6 weeks.
Root Development Timeline
Understanding the root development timeline helps you track your Arrowhead Plant's propagation progress.
When propagating in soil, you'll need to wait 4-6 weeks for roots to establish properly.
After inserting your cutting into the soil up to the first node, maintain consistent moisture by watering every 4-5 days.
You'll know your soil propagation is successful when you spot new leaf growth or notice roots emerging from the drainage holes.
Remember that each cutting develops at its own pace, so don't worry if some take longer than others.
Keep monitoring your Arrowhead Plants throughout the rooting process, and avoid disturbing the cuttings to check for roots.
Instead, watch for those visual cues of growth that indicate successful root development beneath the soil's surface.
Signs of Successful Root Development
Monitoring your Arrowhead plant's progress during propagation reveals several clear signs of successful root development. For successful propagation, you'll want to watch for specific indicators that confirm healthy root growth in your new plants.
Key signs of established roots include:
- Water propagation: Look for roots 2-3 inches long within 1-2 weeks
- Soil propagation: Feel for resistance when gently tugging the cutting after 4-6 weeks
- New leaf growth and increased vigor in the overall plant
- Visible roots emerging from drainage holes in soil-based cuttings
Don't worry if you notice lower leaves yellowing and dropping during water propagation – this often means your plant is focusing energy on root growth.
Watch for improved leaf size and color vibrancy, which signals that your cutting is thriving in its new environment.
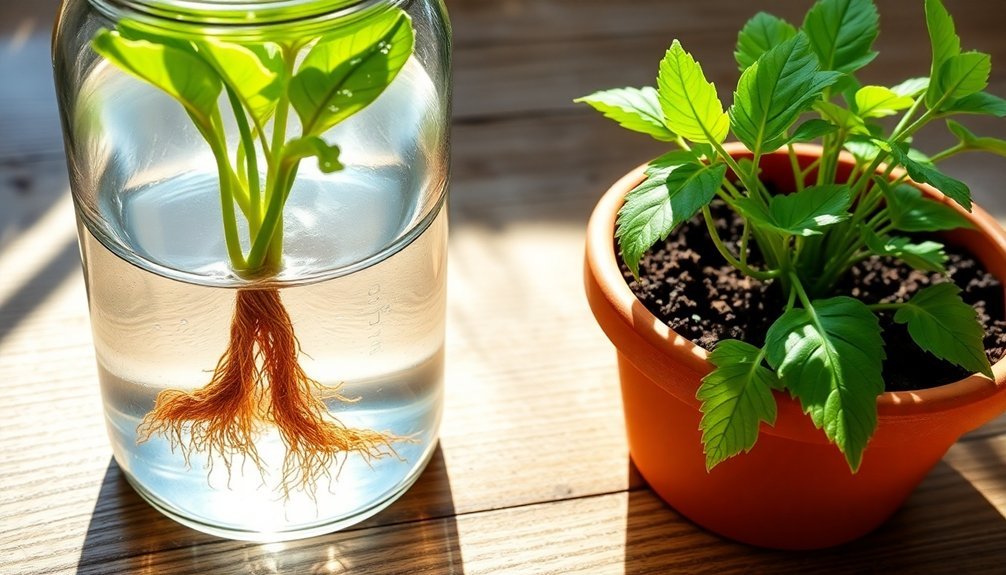
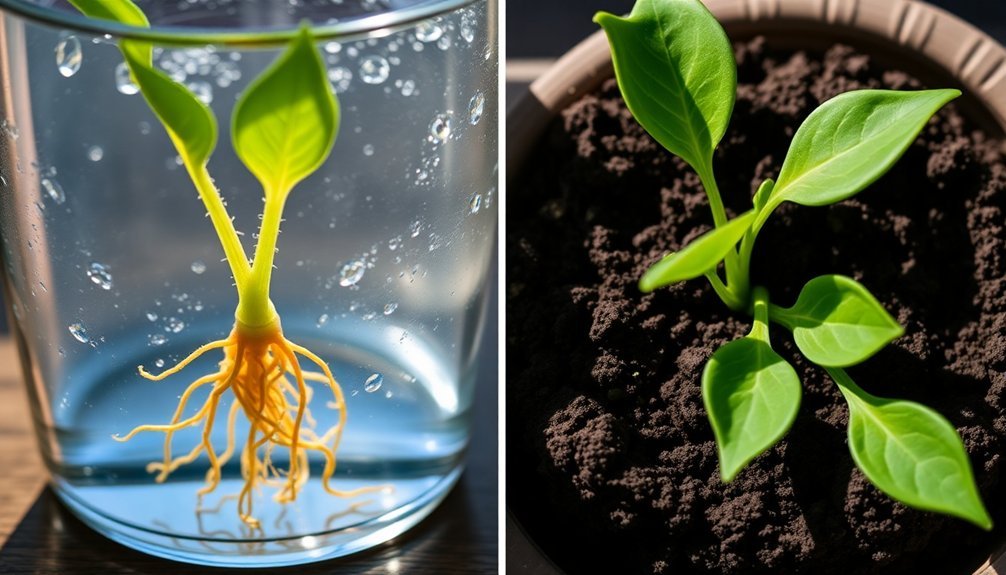
Transferring Water-Rooted Cuttings to Soil
Transfer your arrowhead cutting to soil when its water-grown roots reach at least 2-3 inches long, as this length guarantees better survival rates and establishment.
You'll need to prepare a well-draining potting mix and a container with drainage holes before making the switch to prevent transplant shock.
Keep your newly potted cutting in bright, indirect light and maintain consistent soil moisture for the first few weeks while it adapts to its new growing medium.
Timing The Soil Transfer
Once your arrowhead's roots reach 2-3 inches in length, they're ready for their new home in soil. Timing the soil transfer correctly guarantees your plant develops a strong root system and thrives in its new environment.
Choose a 4-inch pot and prepare a well-draining soil mix with perlite or pumice.
When transferring your cuttings, follow these essential steps:
- Select a container slightly larger than the root ball
- Fill with pre-mixed, well-draining potting medium
- Water thoroughly until moisture drains from the bottom
- Monitor for any signs of stress, like wilting or yellowing leaves
Adjust your watering schedule based on the soil's moisture level.
Don't worry if your plant shows minor stress initially – it's normal as the cutting adapts to its new growing medium.
Preventing Transplant Shock
Moving your water-rooted Arrowhead cutting to soil can be stressful for the plant, but you can minimize shock with proper preparation and care. Before transplanting, wait until the roots reach 2-3 inches long to guarantee better establishment in soil.
Create a well-draining potting mix by combining regular potting soil with perlite or pumice. When you're ready to transplant, place your cutting in bright, indirect light to help it adjust gradually.
Water the soil thoroughly after potting to help roots connect with their new growing medium.
Monitor the cuttings closely over the next few weeks, watching for signs of stress like wilting or yellowing leaves. You'll need to maintain consistent moisture without overwatering.
If you notice any issues, adjust your watering schedule accordingly to help your plant thrive in its new home.
Common Propagation Challenges
While propagating Arrowhead plants can be rewarding, you'll need to navigate several common propagation challenges to guarantee success.
Make sure you position your cutting's nodes correctly in water or soil to promote healthy root development and prevent rot. Place your cuttings in bright indirect light to support growth without burning the leaves.
Key challenges you'll need to monitor:
- Root rot from overwatering – maintain well-draining soil and don't water too frequently
- Bacterial growth in water propagation – change water every 5-7 days
- Poor node placement – verify enough nodes are submerged for successful rooting
- Pest infestations – watch for fungus gnats that thrive in moist conditions
Stay vigilant with these issues, and you'll greatly improve your chances of successful Arrowhead propagation.
Maintaining New Growth
After successfully steering through propagation challenges, your focus should shift to nurturing new growth in your Arrowhead plant.
Position your plant in bright indirect light to promote healthy development while preventing leaf damage from direct sun exposure.
Maintaining new growth requires careful attention to proper moisture levels. Keep the soil consistently moist but never waterlogged, as this balance is vital for root establishment.
You'll want to maintain humidity between 40-60%, using a pebble tray or humidifier if needed. Hold off on fertilizing until you spot new growth, then apply a diluted solution.
Stay vigilant by regularly checking for pests and signs of stress. Quick intervention can make the difference between thriving growth and struggling plants.
Keep the growing area clean and monitor your plant's response to its environment.
Advanced Tips for Healthier Plants
To maximize your Arrowhead plant's potential, implementing advanced cultivation techniques can greatly boost its health and vigor. Focus on keeping the soil consistently moist while avoiding waterlogged conditions that lead to root problems.
Position your plants in bright indirect light, away from harsh sun exposure that could damage tender leaves.
For superior propagation results, consider these expert strategies:
- Confirm cuttings have 2-3 nodes submerged when propagating to establish a robust root system
- Apply rooting hormone to cut stems before planting to accelerate growth
- Maintain humidity levels between 40-60% using a humidifier or pebble tray
- Monitor environmental conditions daily, adjusting light and moisture as needed
These advanced techniques will help you develop stronger, healthier Arrowhead plants while minimizing common cultivation issues that can hinder growth.
Frequently Asked Questions
Is It Better to Propagate Cuttings in Water or Soil?
You'll succeed with either water or soil propagation. Water lets you watch roots develop and shows results faster, while soil's more hands-off. Pick based on whether you want to monitor growth or prefer less maintenance.
Can I Propagate an Arrowhead Plant in Water?
Yes, you can easily propagate your Arrowhead Plant in water. Just take 4-6 inch stem cuttings with 2-3 nodes, place them in clean water, and you'll see roots developing within 1-2 weeks.
Is It Better to Propagate Pothos in Soil or Water?
You can successfully propagate pothos in either water or soil – both methods work well. If you'd like to watch roots develop, choose water. For faster plant establishment, go with soil propagation.
What Is a Mistake With Water Propagation in Soil?
You'll make a critical mistake if you don't change the water regularly. Letting stagnant water sit can breed harmful bacteria and cause your cutting's roots to rot, ultimately preventing successful propagation.
In Summary
You're now equipped to propagate your arrowhead plant using either water or soil methods. Whether you've chosen the water route for its visibility or soil for its stability, remember to maintain ideal humidity and warmth for your cuttings. Don't forget to check root development regularly and keep the growing medium consistently moist. With these techniques mastered, you'll soon have a thriving collection of new arrowhead plants.


Leave a Reply