Water propagation offers you significant advantages for growing anthurium compared to soil methods. You'll see roots develop 2-3 weeks faster in water, and the clear container lets you monitor root health without disturbing the plant. Water also provides better moisture control and reduces the risk of soil-borne diseases that can harm your cuttings. With proper maintenance like regular water changes, you'll reveal the secrets to faster, healthier anthurium propagation.
The Advantages of Water-Based Root Development

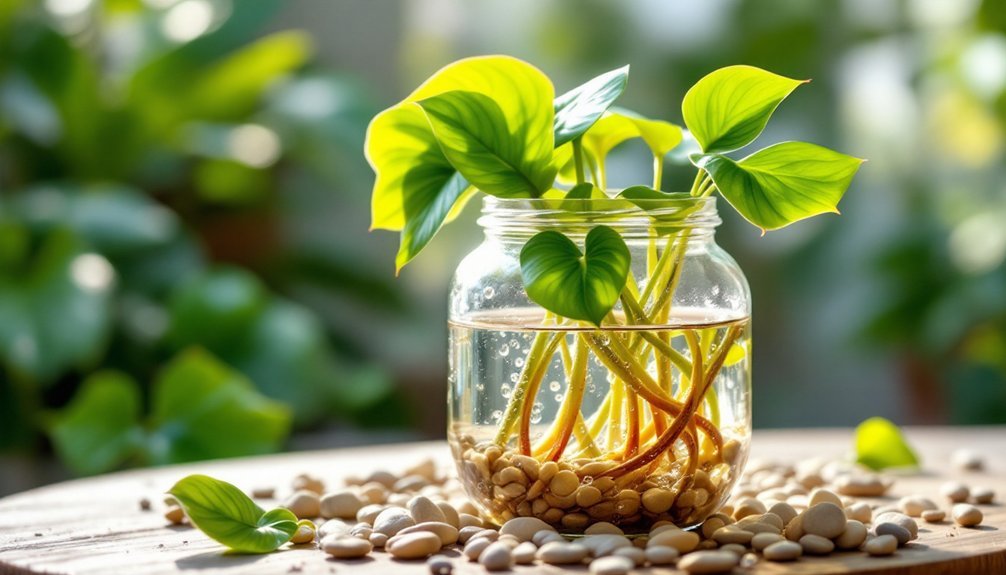
When propagating Anthurium plants, water-based methods offer several compelling advantages over traditional soil propagation.
You'll see faster root development in water, with visible growth appearing in just 4-6 weeks, while soil-based methods typically take longer.
Water propagation lets you monitor your cuttings' health with complete visibility, so you can quickly address any signs of root rot.
The constant moisture levels in water create ideal conditions for root growth, unlike soil's sometimes inconsistent moisture distribution.
You'll also know exactly when to transplant your cuttings by observing root structure development through the clear water.
Another significant benefit is that you won't have to worry about soil-borne pathogens affecting your cuttings during their vital initial rooting phase, making water propagation a cleaner, more controlled method.
Monitoring Root Growth in Crystal Clear Conditions
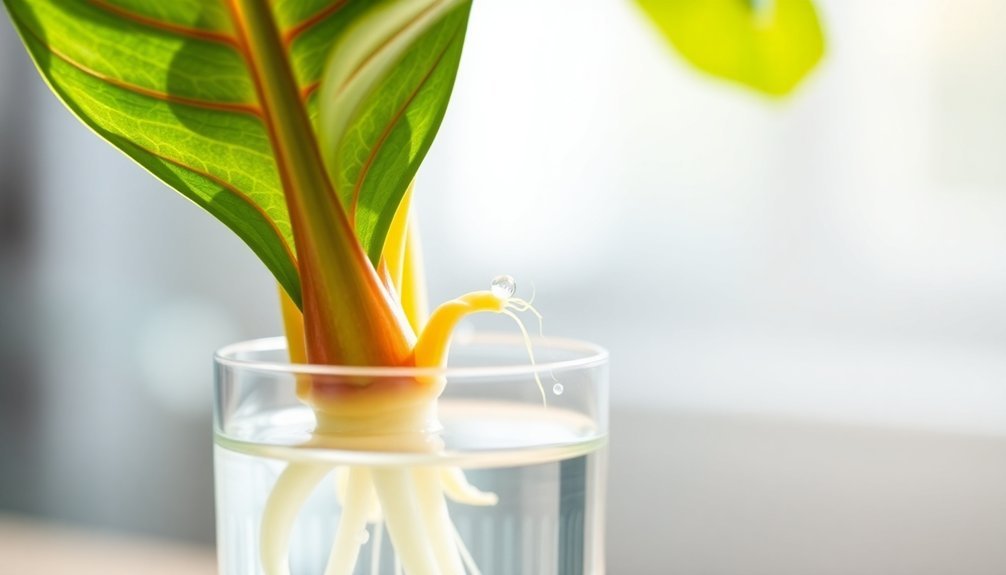
Since water propagation provides a crystal-clear view of your Anthurium's developing roots, you'll be able to track every stage of growth without disturbing the cutting.
You can monitor root development through the transparent container, which typically begins within 4-6 weeks of starting the propagation process.
Water propagation's clear environment helps you prevent overwatering issues, as you'll easily spot any signs of trouble and adjust moisture levels accordingly.
You'll notice faster root growth compared to soil-based methods because your cuttings have direct access to water.
To maintain healthy development, simply change the water every 2-3 days. This regular refresh guarantees your cutting receives enough oxygen while preventing harmful bacterial buildup.
The visibility advantage of water propagation gives you complete control over your Anthurium's rooting progress.
Disease Prevention Through Water Propagation

Water propagation's clear environment not only helps you monitor root growth but also offers significant disease prevention benefits for your Anthurium cuttings. You'll minimize soil-borne diseases and protect your plants from root rot by choosing this sterile environment. The transparent medium lets you spot potential issues instantly, so you can take swift action if needed.
| Benefit | Water Method | Soil Method |
|---|---|---|
| Disease Risk | Minimal | Higher |
| Monitoring | Easy visual checks | Limited visibility |
| Root Development | Faster growth | Slower growth |
| Moisture Absorption | Direct uptake | Indirect uptake |
| Fungal Infections | Easily preventable | More common |
The clean water environment promotes healthy root development while ensuring ideal moisture absorption throughout the propagation process. You'll achieve stronger plants with robust root systems that are naturally more resistant to common fungal infections.
Essential Tools for Water Propagation Success
You'll need a clean, transparent container to monitor root development and prevent bacterial growth during your Anthurium's water propagation journey.
Sanitize your cutting tools with rubbing alcohol or a mild bleach solution to protect your plant from potential pathogens and diseases.
The right container size matters – choose one that's wide enough to prevent your cutting from tipping over but not so large that you're wasting water during frequent changes.
Clean Equipment Prevents Disease
When propagating Anthurium in water, maintaining clean equipment isn't just good practice – it's essential for success. You'll need to sterilize cutting tools with rubbing alcohol or bleach solution to prevent harmful pathogens from affecting your plants. Using a clear propagation container helps you monitor root development effectively.
| Equipment | Cleaning Method | Frequency |
|---|---|---|
| Pruning Shears | Rubbing Alcohol/Bleach | Before/After Use |
| Container | Rinse & Sanitize | Before Each Use |
| Water | Fresh Replacement | Every 2-3 Days |
Don't forget to change the water regularly to provide fresh oxygen to your cuttings. Keep your container free from debris and old water residue, as these can harbor bacteria that might harm your plant. By maintaining clean equipment, you're giving your Anthurium cuttings the best chance at healthy growth and successful propagation.
Proper Container Selection Essential
For successful Anthurium water propagation, selecting the right container plays an essential role in root development.
You'll want to choose a clear container that lets you monitor your cutting's progress while maintaining proper humidity levels. A wide mouth jar made from non-reactive materials like glass or BPA-free plastic will give you the best results and help avoid rot.
Here's what to look for in your propagation container:
- Clear walls that allow you to observe root development without disturbing the cutting
- A stable base that prevents tipping and keeps your cutting upright
- A wide mouth opening that makes water changes easy and promotes air circulation
- A size that's not too large, helping maintain proper humidity while minimizing contamination risks
Selecting the Perfect Cutting for Water Growth
Selecting the perfect cutting is the essential first step in successful water propagation of your Anthurium.
You'll want to choose a healthy stem that's 6-8 inches long with at least one leaf and a node. Make a clean cut at a 45-degree angle below the node to maximize the surface area for root development.
Look for stems with an existing aerial root, as they'll often start growing more quickly in water. Avoid any stems showing signs of disease or pest damage that could contaminate your propagation.
Place your cutting in clear water so you can easily monitor root development. Remember to change the water every 2-3 days to maintain ideal growth conditions. Fresh, oxygenated water is essential for successful water growth of your Anthurium cutting.
Maintaining Optimal Water Quality and Temperature
The success of your Anthurium propagation largely depends on maintaining pristine water conditions and ideal temperatures.
You'll need to focus on water quality to prevent root rot and guarantee healthy root growth. Using distilled water or letting tap water sit for 24 hours helps eliminate harmful chlorine that can damage your plant.
- Keep water temperature between 70-80°F to mimic the plant's natural humid environment
- Change water every 2-3 days to maintain proper oxygenated conditions
- Choose distilled or rainwater over tap water to avoid chemical damage
- Use lukewarm water when replenishing to prevent temperature shock
The Science Behind Water-Based Root Formation
Understanding water-based root formation reveals fascinating biological processes at work in Anthurium propagation.
When you choose water propagation for your Anthurium cuttings, you're creating an ideal environment that accelerates root growth by 4-6 weeks faster than soil methods. The consistent moisture level prevents root rot while eliminating the risks of soil-borne pathogens that could harm your developing plant.
You'll notice that water provides enhanced oxygen availability to the developing roots, resulting in more robust roots that are better equipped for eventual soil transfer.
The clear visibility of the water method lets you monitor root development in real-time, allowing you to spot and address any issues immediately. This transparency, combined with the healthier environment, makes water propagation a scientifically sound choice for successful Anthurium cultivation.
Common Mistakes to Avoid in Water Propagation
To protect your Anthurium cuttings from root rot, you'll need to use a shallow container that keeps just the cut end submerged while allowing proper air circulation around the developing roots.
You must change the water every 2-3 days to prevent harmful bacterial growth that can contaminate your propagation setup and damage the cuttings.
Using lukewarm water during these changes will help maintain ideal conditions for root development while preventing temperature shock to your growing plant.
Preventing Root Rot
Successfully propagating Anthuriums in water requires vigilant attention to prevent root rot, a common issue that can quickly destroy your cuttings.
To guarantee healthy root development, you'll need to maintain ideal conditions and monitor your propagation setup regularly.
- Change your water every 2-3 days to prevent stagnation and harmful bacterial growth.
- Use only clean containers to minimize contamination risks.
- Submerge cuttings just up to the node level, avoiding excessive stem exposure to water.
- Keep your propagation environment between 70-80°F for best results.
Don't let the water level drop too low, as this can stress your cuttings and lead to rot.
Avoiding Water Contamination
When propagating Anthuriums in water, maintaining a sterile environment is essential for preventing contamination that can kill your cuttings.
Start by using clean tools sanitized with rubbing alcohol to prevent introducing harmful bacteria. You'll need distilled water or rainwater instead of tap water, as harmful chemicals like fluoride can damage your plant's leaves.
Don't forget to monitor water clarity using a transparent container and change the water every 2-3 days to prevent bacterial growth. Avoid overcrowding your cuttings, as this creates an unhealthy propagation environment that encourages rot. Each cutting needs sufficient space for proper root development.
You'll know your water needs changing if it becomes murky, which is a clear sign of contamination that could harm your Anthurium's growth.
Transitioning Water-Rooted Cuttings to Soil
While water propagation offers a faster and more visible way to grow Anthurium roots, moving these cuttings to soil requires careful timing and attention.
You'll need to wait until your water-rooted cuttings develop roots at least 2-3 inches long before making the shift to soil. When you're ready to transplant, use a well-draining mix and maintain consistent moisture to prevent root rot.
- Monitor root growth carefully – wait for 4-6 weeks until roots are sturdy and well-developed
- Create a humid environment during the shift to minimize transplant shock
- Keep soil consistently moist but not waterlogged for the first few weeks
- Watch for signs of stress, like wilting or yellowing leaves, and adjust humidity levels accordingly
Don't rush the process – successful acclimation guarantees your Anthurium thrives in its new growing medium.
Humidity Management During Water Propagation
Because Anthuriums originate from tropical rainforests, maintaining proper humidity levels is essential for successful water propagation. You'll need to keep humidity levels between 70-80% throughout the rooting process.
To achieve ideal humidity management during water propagation, cover your propagation container with plastic or use a humidity dome.
You'll want to place your anthuriums in indirect light to prevent excessive evaporation while ensuring they receive enough light for growth. Regular misting helps maintain moisture levels, but don't overdo it, as too much water can lead to fungal issues.
To monitor conditions accurately, use a hygrometer to track humidity levels around your cuttings. This way, you can adjust your setup as needed, whether that means increasing misting frequency or adjusting the container's coverage to create the perfect environment.
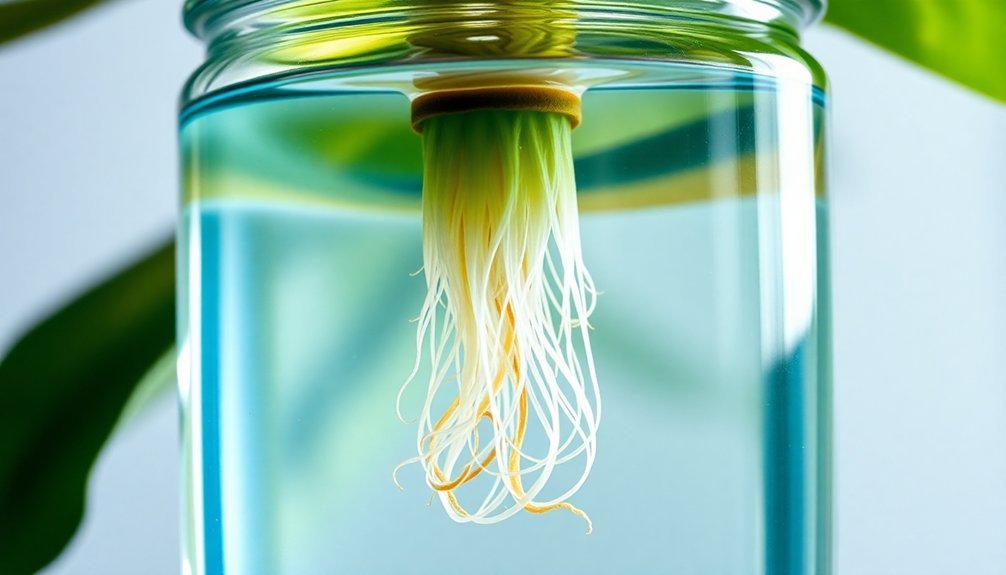
Signs of Successful Water-Based Root Development
Once you've established ideal humidity conditions, monitoring root development becomes your next focus.
You'll want to watch for successful water-based root development in your anthurium cuttings by observing the clear propagation container. White, healthy roots typically emerge within 4 to 8 weeks, indicating your cutting is thriving.
Key indicators of successful root development:
- Small, hair-like structures appearing at the cut stem's end
- White, firm roots reaching 2-3 inches in length, signaling readiness for transplanting into soil
- Clear water maintaining its clarity between water changes every 2-3 days
- Root systems developing multiple branches without signs of bacterial growth
These visual cues help you track root growth progress and determine the best timing for moving your cutting to its permanent growing medium.
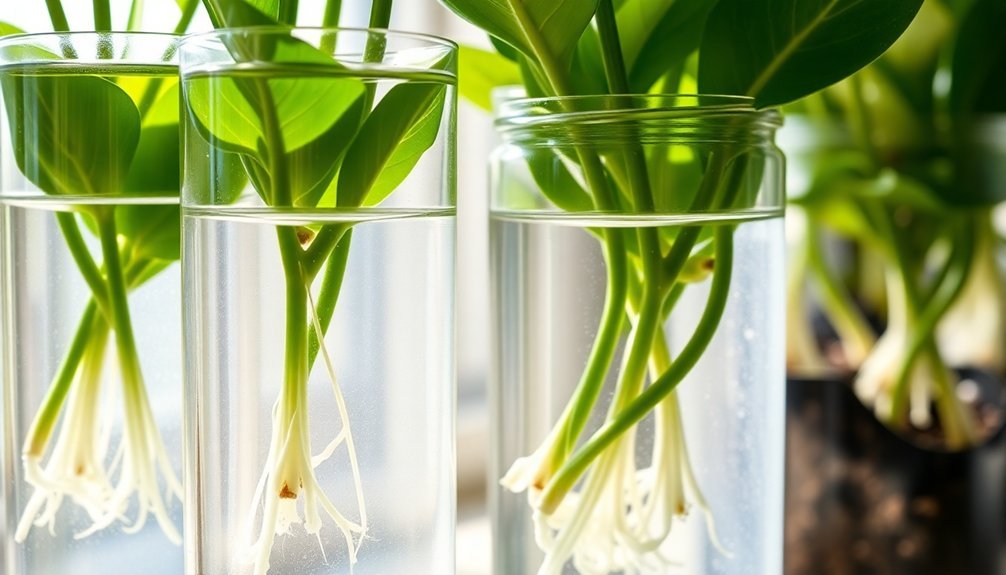
Comparing Growth Rates: Water Versus Soil Methods
When you choose water propagation for your Anthurium cuttings, you'll notice roots emerging within 4-6 weeks, while soil-based methods typically require 6-8 weeks for visible root development.
Water propagation's controlled moisture environment gives your cuttings consistent access to water and oxygen, resulting in more vigorous root systems than soil-based methods.
You'll find it easier to monitor root health and development in water, allowing you to spot and address any issues before they become problematic.
Root Development Speed Analysis
While both water and soil propagation methods can successfully grow Anthurium cuttings, water propagation typically yields faster results, with roots emerging in just 4-6 weeks compared to soil's 6-8 week timeline.
Water propagation's efficiency stems from its constant moisture supply, allowing Anthurium cuttings to focus energy on root establishment rather than searching for water.
- Anthurium's natural epiphytic traits make them well-suited for water propagation, as they're adapted to absorb moisture from their environment.
- You'll notice quicker root development since there's no competition with soil pathogens.
- The transparent medium lets you monitor root growth and health in real-time.
- Root rot risks decrease considerably due to the absence of soil-borne diseases.
These advantages make water propagation an ideal choice for faster, healthier Anthurium growth.
Moisture Control Advantages
Managing moisture levels becomes effortless with water propagation, giving it a distinct advantage over traditional soil methods.
You'll find that this approach maintains consistent moisture around your Anthurium cuttings, considerably reducing the risk of them drying out during the critical rooting phase.
Water propagation offers superior moisture control while eliminating the threat of soil-borne pathogens that can compromise root development.
You can easily monitor the health of the cuttings through the transparent container, ensuring ideal growth conditions.
The constant water supply, combined with improved oxygenation, promotes healthier root systems than soil-based methods.
This precise moisture management leads to higher success rates in your propagation efforts, as you won't need to worry about under or overwatering.
Your cuttings will have the perfect environment to develop strong, viable roots.
Troubleshooting Water Propagation Challenges
Despite its reputation as a straightforward method, water propagation of Anthuriums can present several common challenges that require prompt attention.
You'll need to monitor water level regularly and change water every 2-3 days to prevent stagnation and guarantee peak growth. Using clear containers in bright indirect light will help you track root growth while avoiding potential issues.
- Watch for yellowing leaves or slow root development, which often indicate insufficient light exposure.
- Check water levels daily, as roots can quickly absorb moisture, leaving stems exposed.
- Replace cloudy or discolored water immediately to prevent bacteria growth.
- Maintain water temperature by keeping containers away from drafts or direct sunlight.
Remember that healthy roots typically develop within 4-8 weeks, so don't rush the process before shifting to soil.
Frequently Asked Questions
Is It Better to Propagate in Water or Soil?
You'll find water propagation more effective for your Anthurium. It's faster, lets you monitor root growth clearly, and creates vigorous roots. Plus, you won't need to worry about soil moisture management while roots develop.
Do Anthuriums Grow Better in Water or Soil?
While you'll get faster initial rooting in water, your Anthurium needs soil for long-term growth. Start propagation in water for best results, but you must shift to soil for healthy, sustained development.
Can You Propagate Anthurium in Water?
Yes, you can propagate anthurium in water. It's an effective method where you'll place a 6-8 inch stem cutting with nodes in clean water. You'll see roots develop within 4-6 weeks with regular water changes.
How Do You Propagate Anthurium in Soil?
Cut a healthy stem below a node at 45 degrees, dip it in rooting hormone, and plant in well-draining soil. Keep it moist in bright, indirect light. You'll see new growth in 4-6 weeks.
In Summary
You'll find water propagation for anthuriums offers unmatched visibility, cleaner conditions, and better control over root development. When you're propagating in water, you can quickly spot and address any issues, maintain ideal moisture levels, and reduce the risk of rot or disease. While both methods can succeed, water propagation's simplicity and higher success rate make it an excellent choice for both beginners and experienced growers.


Leave a Reply