
To root ZZ plant stem cuttings, select a healthy 3-4 inch stem with 1-2 leaves and cut it at a 45-degree angle below a node. Let the cut end callus for an hour, then place it in room temperature water in a clear container. Position the container in bright indirect light and change the water weekly. Once roots reach one inch, transplant into well-draining soil. With proper care and these simple steps, you'll discover the rewarding process of growing new ZZ plants.
Selecting the Right Stem for Cutting
Success in propagating ZZ plants starts with choosing the perfect stem cutting. You'll want to look for a healthy stem that's at least 3-4 inches long with 1-2 leaves attached. The stem should be firm and robust, showing no signs of discoloration or poor health that could hinder rooting success.
When you're ready to take your cutting, use a sharp knife or sterilized pruning shears to make a clean cut. Focus on stems near the base of the plant where active growth occurs, as these have the best chance of developing roots.
After cutting, let the stem callus for a minimum of an hour before planting. This brief drying period helps prevent rot and improves your chances of successful propagation.
Preparing Your Tools and Materials
Before starting your ZZ plant propagation, you'll need clean, sharp pruning shears or a knife, rooting hormone, and a well-draining potting mix or clear container for water propagation.
Sterilize your cutting tools with rubbing alcohol to prevent bacteria from affecting your cuttings.
Choose either a transparent container for water propagation to monitor root growth or a small pot with drainage holes for soil propagation, making sure your chosen container matches your preferred propagation method.
Essential Propagation Equipment Needed
Gathering the right propagation tools and materials is critical for ZZ plant success.
You'll need sharp pruning shears or a clean knife to make precise cuts that promote healthy stem cuttings. Choose a clear or green translucent water container to easily monitor root development during the initial propagation phase.
Don't forget to get rooting hormone, which will speed up and improve your success rate.
For the final growing stage, you'll need well-draining pots that are at least twice the size of the root ball. Select a quality soil mixture, like Rosys ZZ plant soil, to provide ideal growing conditions for your newly rooted cuttings.
Having these essential items ready before you start will guarantee a smooth propagation process and give your ZZ plant cuttings the best chance to thrive.
Cleaning Your Cutting Tools
Proper sanitation of your cutting tools plays an essential role in successful ZZ plant propagation.
You'll need either sharp pruning shears or a sanitized knife to make clean cuts that minimize damage and prevent disease transmission. Before you begin, wipe down your tools with rubbing alcohol or a bleach solution (1:9 ratio with water) to eliminate any harmful pathogens.
After cleaning, let your tools air dry completely so any disinfectant residue evaporates. It's vital to inspect tools regularly for rust or damage, replacing them when necessary to maintain proper care standards.
Always store your cutting implements in a dry, clean location to prevent contamination between uses. These simple but essential steps will help guarantee your ZZ plant cuttings have the best chance of successful rooting.
Right Container Selection
Selecting the right container for your ZZ stem cuttings sets the foundation for successful propagation.
You'll want to choose a clear or green translucent container that's 2-3 inches deep to monitor root growth and water levels easily. The container should be made of non-porous material like glass or plastic to prevent moisture loss and maintain proper humidity levels around your cutting.
Essential features for your propagation container include:
- Wide opening for easy cutting placement and removal
- Clear sides to monitor root development
- Sufficient depth to cover the cut end
Before using your container, thoroughly clean it with dish soap or diluted bleach solution to prevent disease and algae growth.
This simple preparation step helps create an ideal environment for your ZZ cutting to develop healthy roots.
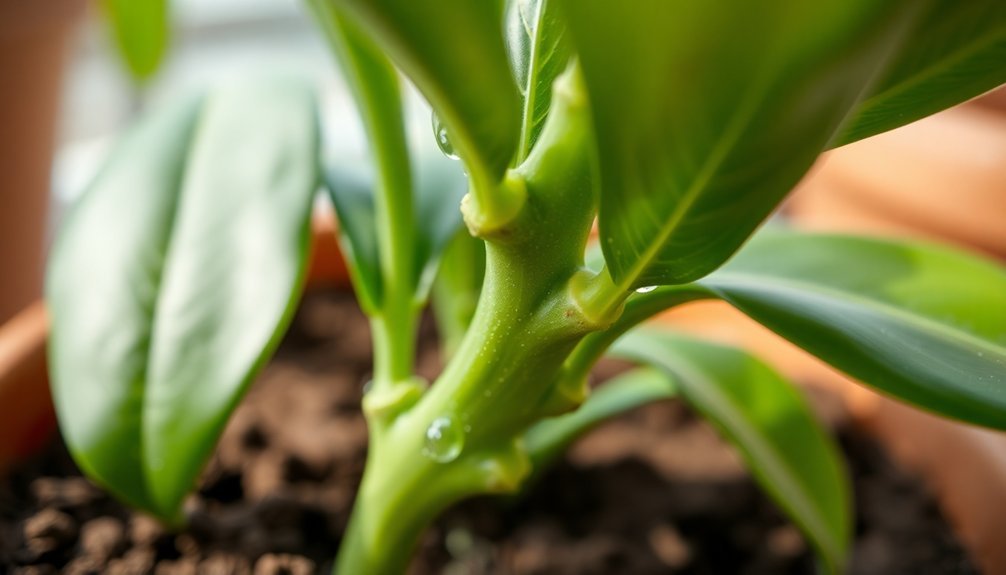
Making Clean Cuts From the Parent Plant
The success of your ZZ plant propagation begins with clean, precise cuts from the parent plant.
You'll need sharp, sterilized pruning shears to prevent disease transmission and guarantee ideal root development. When making clean cuts from your parent ZZ Plant, position your shears at a 45-degree angle just below a node, cutting stems that are at least 3-4 inches long with 1-2 leaves attached.
Before proceeding with propagation, let your cuttings callus for about an hour in a warm, dry location. This vital step helps prevent rot and increases your chances of successful propagation.
Remember to only take cuttings from healthy plants, avoiding any that show signs of stress or disease. These careful cutting techniques will give your ZZ Plant the best start in its propagation journey.
Allowing the Cut End to Callus
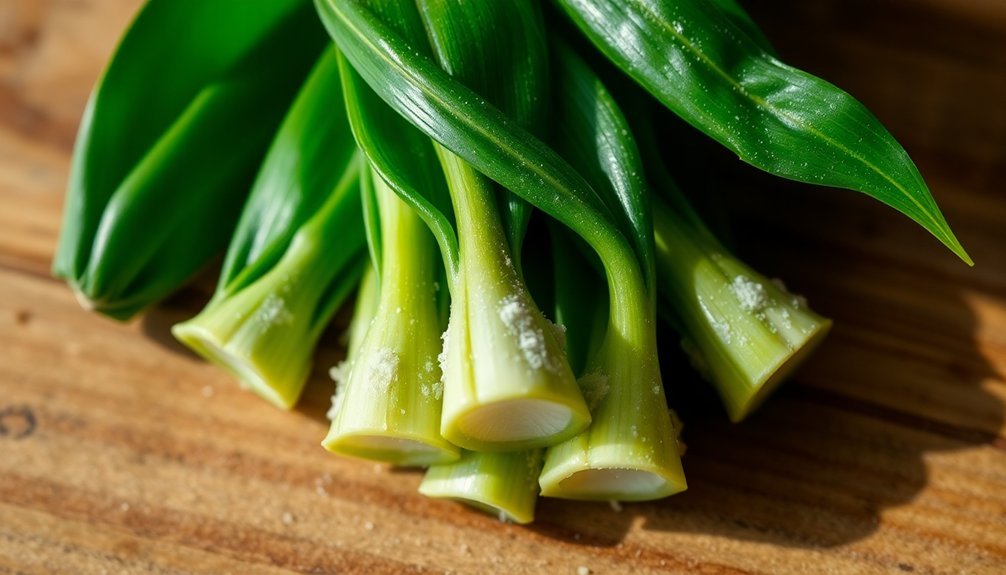
Once you've made your clean cuts, allowing the ZZ stem ends to callus is an essential step that prevents rot and promotes healthy root development.
By cutting at a 45-degree angle, you'll increase the surface area where the protective layer forms. Let the stems rest for about an hour in a warm spot away from direct sunlight to guarantee proper healing.
For successful root growth, follow these key practices:
- Allow the cut end to callus completely before moving to the next step
- Keep the cutting in an environment that's warm but not directly exposed to sunlight
- Monitor the callusing process to guarantee the protective layer forms properly
Once callused, you can proceed with propagation by placing the cutting in either water or well-draining soil, knowing you've minimized the risk of rot.
Setting Up the Rooting Environment
Creating an ideal rooting environment starts with a clean, clear container that lets you monitor root development. Fill it with room temperature water, ensuring there's at least 3 inches of depth to cover the cut ends of your ZZ stems.
Before placing the cuttings in water, you'll want to let the cut ends callus for about an hour. This step helps prevent rot and promotes successful rooting.
Position your container in bright indirect light, but avoid direct sunlight as it can stress your cuttings. Remember to change the water weekly to prevent stagnation and maintain ideal conditions for root growth.
Keep an eye on the water level, making sure it consistently covers the stems. This well-maintained rooting environment will give your ZZ cuttings the best chance at developing strong, healthy roots.
Maintaining Proper Growing Conditions
Successful ZZ plant propagation relies on maintaining consistent growing conditions after setting up your rooting environment.
You'll need to focus on several key factors to guarantee your cuttings develop strong roots. Place your cuttings in bright indirect light to prevent stress while promoting root growth.
Essential steps for maintaining proper growing conditions:
- Keep a consistent water level of 3 inches, changing it every two weeks to prevent stagnation
- Monitor temperature between 65°F to 75°F for ideal growing conditions
- Use room temperature water when renewing the container
Remember to let your cuttings callus for an hour before placing them in water. This vital step helps prevent rot and guarantees successful rooting.
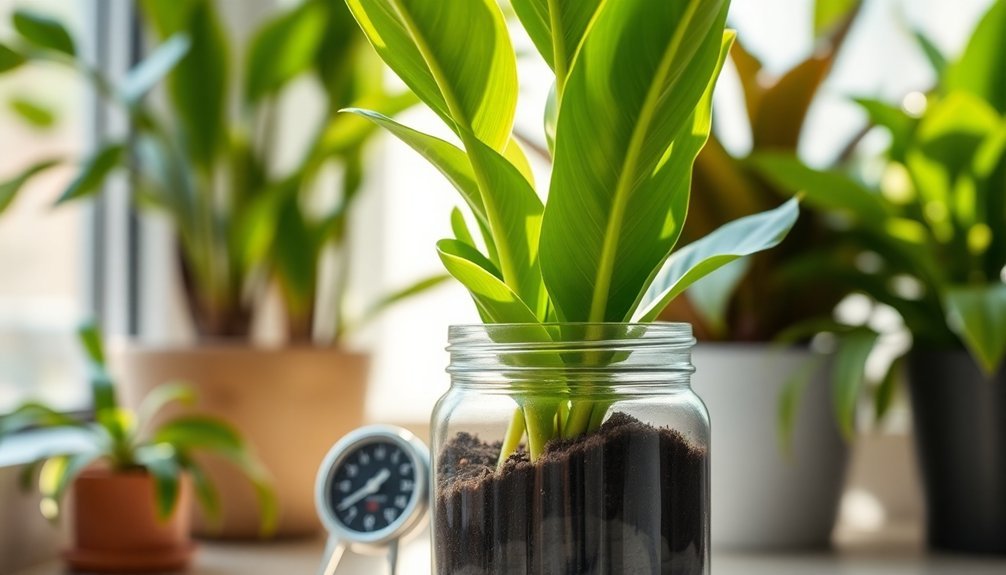
Transplanting Your Rooted Cutting
The transplanting process begins when your ZZ cutting displays healthy roots at least one inch long.
It's time to move your rooted cutting from water to a permanent home in soil. Prepare a well-draining potting mix by combining regular potting soil with perlite or orchid bark for ideal drainage.
Make a 1-2 inch deep hole in your prepared soil. Place the rooted cutting carefully into the hole, making sure the roots are completely covered while keeping the stem above the soil line.
Thoroughly water your newly transplanted cutting, allowing excess water to drain freely to prevent root rot. Position your pot in bright indirect light and focus on monitoring soil moisture levels.
Only water again when the top couple inches of soil feel dry to touch.
Frequently Asked Questions
How to Propagate ZZ Plant From Stem Cutting?
Cut a healthy 3-4 inch stem with leaves, let it callus, place in water with weekly changes. After roots grow 1-inch long, transplant to well-draining soil. You'll need patience as it takes months.
Is It Better to Root a ZZ Plant in Water or Soil?
You'll get quicker results with water propagation in 2-4 weeks, but soil propagation creates stronger roots in 6-8 weeks. Choose water if you want to monitor progress, soil if you prefer less maintenance.
Can I Grow a ZZ Plant From a Broken Stem?
Yes, you can grow a ZZ plant from a broken stem! Just let the break callus for an hour, then place it in water or soil. It's a resilient plant that'll root well with proper care.
How Do You Root Stem Cuttings in Water?
Cut your stem with clean shears, let it callus for an hour, then place it in water. Keep the cut end submerged, change water weekly, and provide bright indirect light until roots develop.
In Summary
Now that you've followed these steps, you'll have successfully propagated your ZZ plant through stem cuttings. Remember: patience is essential, as rooting can take several weeks. Don't worry if some cuttings don't make it – that's normal. Once your new plants are established, you'll have beautiful ZZ plants to keep or share with friends. Keep practicing these techniques, and you'll become a propagation pro in no time.


Leave a Reply