
You can multiply snake plants by cutting healthy leaves into 2-inch sections using clean, sharp tools. Let the cuts callus for 1-2 days, then dip them in rooting hormone. Plant sections in well-draining soil or place in water, keeping them in bright indirect light at 65-75°F. Water sparingly and maintain humidity with a clear dome. After 4-6 weeks, look for root development before transplanting. Following these key steps will help guarantee your propagation success.
Essential Tools and Materials Needed
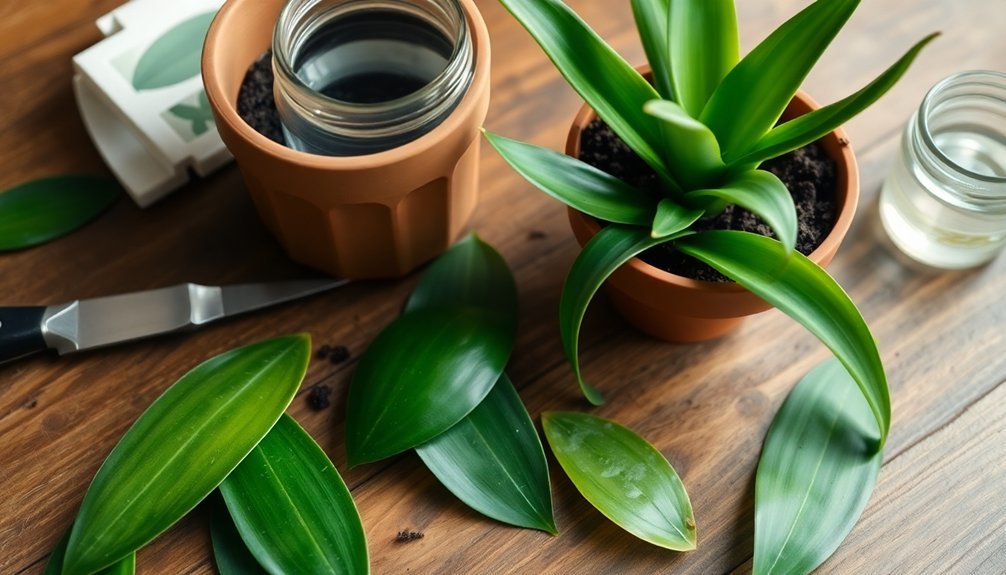
A successful snake plant propagation starts with gathering the right tools and materials.
You'll need a sharp knife, scissors, or garden shears to make clean cuts through mature leaves, ensuring 1-2 inch sections for ideal growth. Prepare sterile containers with drainage holes, which will prevent root rot and provide proper water management.
Select well-draining potting soil or create a custom mix using sand and peat moss to support healthy root development.
Don't forget to pick up rooting hormone – it's not mandatory but can greatly boost your propagation success rate.
You'll also want to have measuring cups for precise watering, plastic bags or domes to maintain humidity, and labels if you're working with multiple varieties.
These basic supplies will set you up for successful snake plant multiplication.
Best Time of Year to Take Leaf Cuttings
While snake plants are remarkably resilient, timing your leaf cuttings correctly can considerably boost your propagation success rate. The best time of year to take leaf cuttings is during early spring and early summer when your snake plant enters its active growth phase.
You'll want to avoid winter months when the plant becomes dormant and its growth considerably slows down. Instead, plan your propagation efforts for early morning or late afternoon during the warmer seasons, when temperatures are cooler and your plant experiences less stress.
Watch for signs that your plant is ready for propagation, such as mature leaves and visible pups, which indicate a healthy root system. By choosing the right timing, you'll considerably improve your chances of successfully multiplying your snake plant collection.
Selecting Healthy Parent Plant Leaves
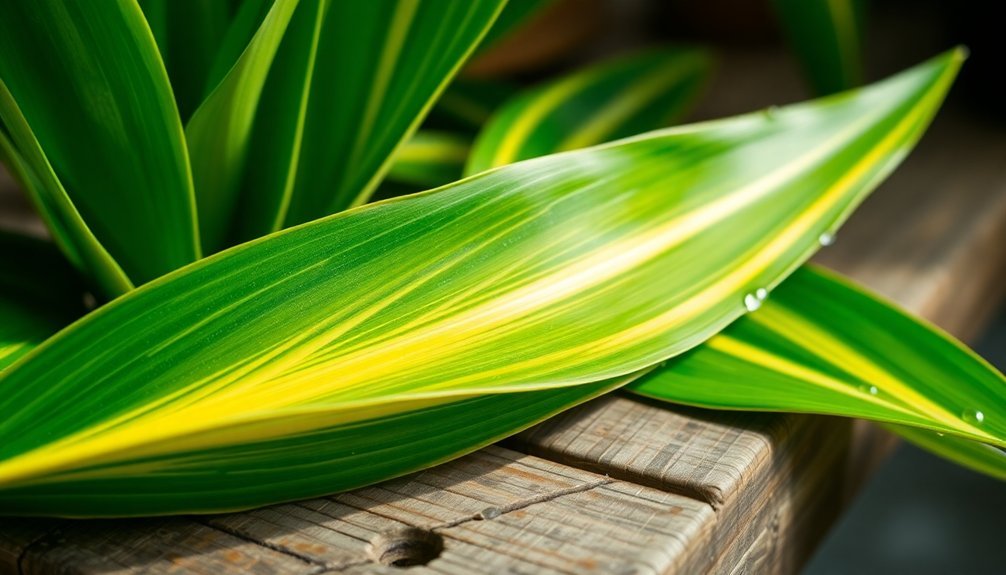
Successful snake plant propagation starts with selecting the right parent leaves.
You'll want to choose mature, firm leaves from the outer edges of your parent plant, as these are typically more robust and have better propagation success rates. Look for vibrant leaves that are at least 6 inches long and free from any signs of disease, yellowing, or pest damage.
When preparing your cuttings, use sterilized tools to make clean cuts close to the plant's base. This helps prevent contamination and promotes healthy growth.
Key characteristics for selecting healthy leaves:
- Firm texture with no soft spots or wrinkles
- Rich, uniform color without yellowing or brown patches
- Minimum length of 6 inches for ideal propagation success
Proper Cutting Techniques and Angles
Making precise cuts is essential for snake plant propagation success. When you're ready to propagate snake plants, use sharp scissors or a knife to make clean leaf cutting sections from mature, healthy leaves at the base of the plant.
For ideal root cuttings, slice the leaves into 2-inch segments, marking each piece with a slanted angle at the cut end. This angled cut helps you maintain proper orientation when planting and promotes better root development.
Before planting, let the cut sections dry for 1-2 days to form a protective callous, which prevents rot and encourages healthy root growth.
You'll get the best results by dipping each cut end into rooting hormone – this simple step accelerates root formation and greatly increases your chances of successful propagation.
Preparing the Growing Medium
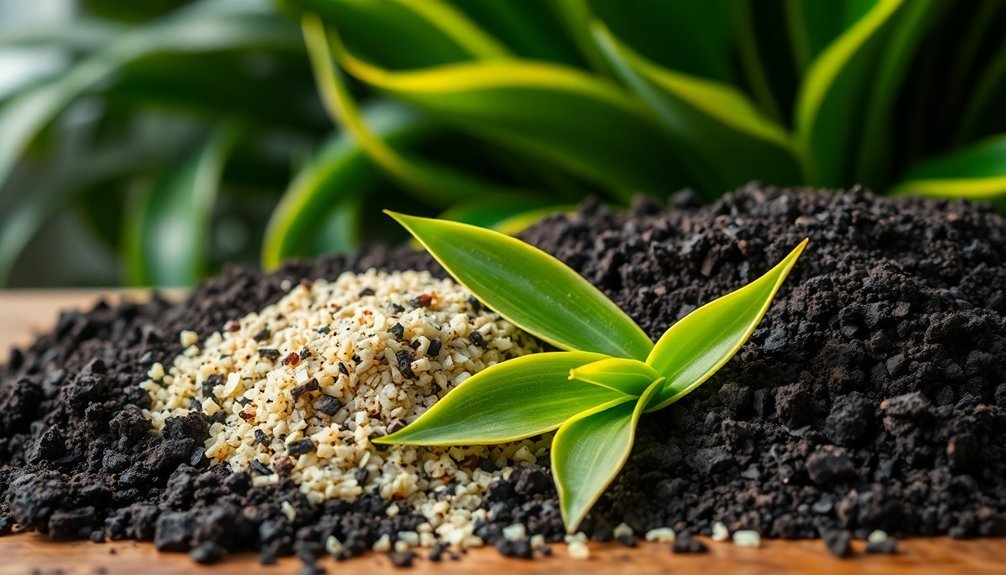
With your cuttings prepared, the next step focuses on creating the ideal growing environment.
You'll need a well-draining potting mix that combines peat moss, perlite, and coarse sand. For best results, consider sterilizing your mix at 180°F for 30 minutes to eliminate harmful pathogens.
Select containers at least 2 inches deep with drainage holes, then thoroughly moisten the growing medium before planting. The soil should be damp but not waterlogged to prevent rot issues.
Key preparation steps:
- Mix your growing medium in equal parts to guarantee proper aeration and moisture retention
- Test drainage by watering the container and checking how quickly it flows through
- Monitor soil moisture regularly by inserting your finger about an inch deep – it should feel slightly damp
Water vs. Soil Propagation Methods
When multiplying your snake plant, you'll need to choose between water propagation, which offers visible root development monitoring, and soil propagation, which typically yields faster results.
Water propagation requires submerging 25% of a mature leaf in a jar with weekly water changes, while soil propagation involves planting callused leaf sections directly into well-draining potting mix.
For beginners, soil propagation often proves more successful due to its straightforward approach and lower risk of rot, though both methods can effectively produce new plants.
Choose Your Propagation Method
Since snake plants can thrive through multiple propagation methods, you'll need to choose between water and soil propagation before getting started.
While both methods effectively propagate snake plant cuttings, each offers distinct advantages. Soil propagation typically produces stronger roots and develops new plants faster, but you'll need to carefully monitor moisture to prevent root rot.
Consider these key factors when deciding:
- Water propagation lets you observe root development clearly, making it easier to track progress over the 2-4 month period.
- Soil propagation doesn't require weekly water changes and generally creates more robust root systems.
- Your personal style matters – visual learners might prefer water propagation, while experienced gardeners often opt for soil methods.
Choose the method that best matches your patience level and monitoring preferences, as both can lead to successful results.
Water Technique Benefits
The water propagation method offers several distinct advantages for snake plant enthusiasts. You'll be able to monitor progress clearly as roots develop in the transparent container, making it easier to determine the perfect time for soil transfer.
| Feature | Water Method | Soil Method |
|---|---|---|
| Visibility | See root growth | Hidden progress |
| Disease Risk | Lower chance | Soil-borne issues |
| Maintenance | Weekly water changes | Regular soil checks |
| Mess Factor | Clean and simple | More handling required |
To prevent rot while ensuring successful root development, submerge only 25% of your cutting in water. While this technique takes longer than soil propagation (2-4 months), you'll benefit from a more controlled environment. Weekly water changes provide fresh nutrients and reduce bacterial growth, making this method particularly suitable for beginners who want a cleaner, more straightforward approach to propagation.
Soil Success Tips
Direct soil propagation stands out as the more reliable choice for multiplying snake plants, despite taking a similar time investment as the water method. By planting your cuttings directly in soil, you'll develop stronger root systems from the start, eliminating the need to transfer plants later.
To guarantee successful soil propagation, follow these essential steps:
- Cut mature leaves into 1-2 inch sections and let them callous for 1-2 days before planting.
- Place cuttings about half an inch deep in well-draining potting soil.
- Keep the soil consistently moist but never soggy to prevent root rot.
This method proves particularly beneficial for beginners, as it creates more robust plants from the outset.
You'll find that proper soil moisture and drainage are key factors in developing healthy root systems that support long-term plant growth.
Using Rooting Hormones Effectively
When propagating snake plants, rooting hormones can greatly boost your success rate and speed up the root formation process. These hormones, containing synthetic auxins like IBA and NAA, stimulate root growth when applied to your snake plant leaf cuttings.
| Do's | Don'ts |
|---|---|
| Use clean container | Mix with main powder |
| Apply thick layer | Reuse old hormone |
| Store in dark place | Share containers |
| Replace every 2 years | Store in light |
| Dip cut end fully | Touch with fingers |
Before planting your cutting, dip the cut end in either powder or liquid hormone. Make sure you're using a separate container for dipping to prevent contamination. You'll get the best results with a thorough application on the cut surface. Always store your rooting hormones in their original containers in a cool, dark spot, and remember to replace them every two years for maximum effectiveness.
Creating Optimal Growing Conditions

To multiply your snake plants successfully, you'll need to balance both light and temperature, keeping them in bright indirect light for 4-6 hours daily while maintaining temperatures between 65-75°F.
You'll want to create the perfect moisture balance using a well-draining mix of peat moss, perlite, and sand, which prevents waterlogging while retaining essential moisture.
Cover your cuttings with a plastic dome to maintain humidity, but guarantee proper ventilation to prevent mold growth and promote healthy root development.
Light and Temperature Control
Because snake plants need specific environmental conditions to multiply successfully, maintaining proper light and temperature control is crucial for their propagation.
You'll want to place your cuttings in bright, indirect light for 4-6 hours daily to promote healthy growth and root development. Keep the temperature between 65°F to 75°F (18°C to 24°C) to create ideal rooting conditions.
For the best propagation results:
- Monitor light intensity regularly to prevent leaf scorching from direct sunlight
- Use a heat mat to maintain rooting media temperature at 75°F to 80°F (24°C to 27°C)
- Track humidity levels alongside temperature to guarantee balanced growing conditions
Remember that insufficient light can slow down root formation, so finding the right balance of environmental factors will greatly impact your propagation success.
Moisture and Drainage Management
Establishing proper moisture and drainage conditions serves as the foundation for successful snake plant propagation. You'll need to use a well-draining potting soil mixed with perlite or sand to prevent waterlogging and promote healthy roots. Verify your containers have drainage holes to prevent water from pooling at the bottom.
| Moisture Management | Drainage Solutions |
|---|---|
| Water sparingly | Use perlite/sand mix |
| Allow soil to dry | Choose holed containers |
| Maintain slight dampness | Avoid water pooling |
| Use humidity dome | Enable air circulation |
Keep the soil slightly moist but never wet, as excess moisture can lead to root rot. While a humidity dome can help maintain ideal conditions, remember to provide adequate ventilation to prevent mold growth. Monitor your cuttings regularly and adjust watering frequency based on environmental conditions.
Caring for New Leaf Sections
Once you've successfully propagated your snake plant leaf sections, proper care becomes essential for their development into healthy new plants.
Plant your new snake plants in well-draining potting soil and position them in bright indirect light to support healthy growth. Maintain consistent moisture while allowing the top inch of soil to dry between waterings to prevent root rot.
For ideal growth of your leaf sections, focus on these key care elements:
- Keep temperatures between 65°F to 75°F (18°C to 24°C) to encourage strong root development
- Monitor regularly for signs of pests or diseases, addressing any issues promptly
- Avoid direct sunlight which can damage the delicate new growth
These care practices will help your leaf sections establish themselves and grow into robust new snake plants, ensuring successful propagation results.
Monitoring Root Development

Successful propagation depends on healthy root development, which you'll need to monitor carefully during the first few weeks.
For water propagation, watch for tiny white roots emerging from the base of your cuttings within 2-4 weeks, and remember to change the water weekly to keep it fresh. Keep the cut ends submerged to encourage root growth.
If you're propagating in soil, you can check for root development by gently tugging on the cuttings after 4-6 weeks. When you feel resistance, it means a root ball is forming.
Your cuttings need consistent moisture, but don't overwater them as this can lead to rot. Once the roots reach 2-3 inches in length, it's time to transfer them to a permanent pot with well-draining soil.
Transplanting New Growth Successfully
After your snake plant cuttings have developed strong roots, you'll need to move them to their permanent home. Choose a pot with drainage holes and fill it with well-draining potting mix to guarantee your transplants thrive. When the root system reaches 2-4 inches in length, you're ready to begin transplanting.
- Select a container that's slightly larger than the root ball and has adequate drainage holes.
- Use a loose, well-draining potting mix to prevent water retention and root rot.
- Position your newly transplanted cuttings in bright, indirect sunlight.
After placing your cuttings in their new pots, water them lightly to help the soil settle around the roots.
Don't overwater, as this can stress your young plants. Keep them in indirect sunlight until they've established themselves in their new environment.
Common Problems and Solutions
While propagating snake plants can be rewarding, you'll likely encounter several common challenges along the way. Overwatering is one of the biggest threats, so make sure you're using well-draining soil and letting it dry between waterings to prevent root rot.
If your cuttings aren't thriving, they might need more bright indirect light – aim for 4-6 hours daily to boost growth.
Watch for wilting or yellowing leaves, which often signal dehydration. You can combat this by trimming larger leaves and maintaining humidity with protective covers.
To speed up the propagation process, try using rooting hormones, but apply them carefully with sterile tools.
Don't forget to check regularly for pests like mealybugs and spider mites. If you spot an infestation, treat it promptly with neem oil or insecticidal soap.
Frequently Asked Questions
Can You Propagate Multiple Snake Plants From One Leaf?
Yes, you can grow multiple snake plants from one leaf! Just cut it into 2-inch sections, let them callus, dip in rooting hormone, and plant them in well-draining soil with proper light and moisture.
How to Make a Snake Plant Multiply?
You can multiply your snake plant by cutting a mature leaf into 2-inch sections, letting them callus, then planting them in well-draining soil. Keep the soil slightly moist and provide bright, indirect light.
How to Grow a Snake Plant From Leaf Cuttings?
Cut healthy leaves into 2-inch sections, dip them in rooting hormone, and let them dry. Plant sections in moist, well-draining soil, keeping them in bright indirect light. You'll see new growth in 4-8 weeks.
How to Get a Snake Plant to Produce Pups?
You'll encourage pup production by keeping your snake plant healthy with bright indirect light, proper watering, and fertilizing during growing season. Ascertain it's mature with 3-5 leaves and a strong root system.
In Summary
You've learned all the essentials for multiplying your snake plants through leaf cuttings. With the right tools, timing, and technique, you'll be able to create new plants from a single healthy leaf. Remember to keep the soil slightly moist, maintain warm temperatures, and be patient as roots develop. Don't get discouraged if your first attempt isn't perfect – snake plant propagation gets easier with practice.


Leave a Reply